An article originally posted on wereallgeeks
Building your own arcade control panel can be daunting, but very rewarding. Everything one needs to know to make an arcade control panel has been said and done. Or was it? We covered the bases at WereAllGeeks and it was recently reposted on the GameOnGrafix’s blog. This includes all one needs to know to build it – but not to Designing Your Arcade Panel Layout.
Today we will discuss this very matter, by exploring the redesign of our standup arcade control panel.
For over a decade, the reference for arcade joystick and button placement has been Slagcoin. However, they focus on a single joystick construction. What if there are multiple joysticks on an arcade control panel? These can still be used as a reference, but more research has to be done on the placement of the various components.
Designing Your Arcade Panel Layout
1- Scope
Our standup arcade cabinet’s panel was originally designed the same way, but for only two players – each with a joystick and 6 buttons.
One of the rationales for rebuilding the control panel is to add more possibilities to the arcade cabinet. Extra hardware was originally omitted, but some favorite classics include spinners, trackball,s or flight sticks. Oddly enough, the bat-style joystick may be better for fighting games, but old-style retro games from the 80s were designed with ball-top joysticks, and adding this possibility is also being considered.
Finally, the finish did not stand the test of time and is due for a good refresher.
Here is what the cabinet looked like at the beginning of the project.
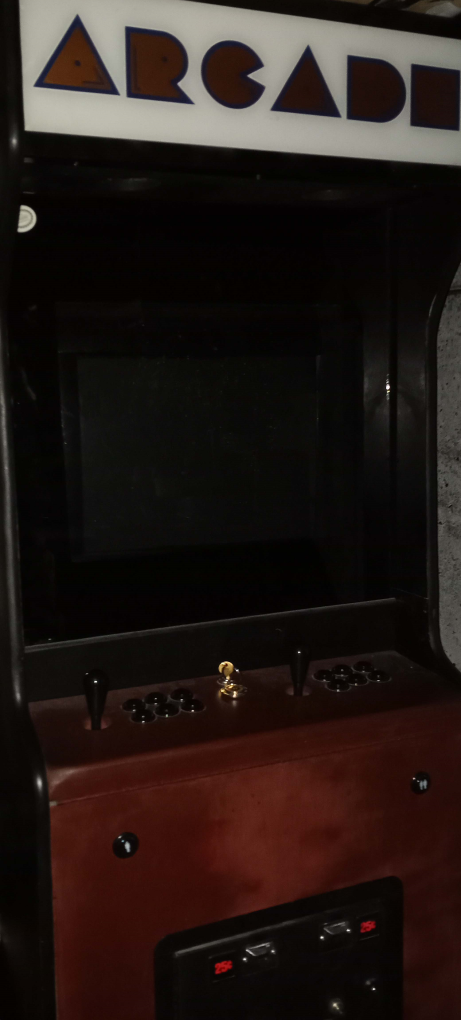
2- Requirements for Designing Your Arcade Panel Layout
Here are what we would like to accomplish with the refit.
-Unlock ball-top arcade classics such as the Donkey Kong series.
-Unlock paddle/spinner games such as the Arkanoid series.
-Unlock trackball games such as Missile Command.
-Keep the two-player Fighting games capability
-Keep the coin mech for credit insert
-Keep the player start buttons
-Add a USB maintenance port
3- Hardware
Here are the hardware acquired to install on the new panel:
-2x (joystick and 6 buttons) (US-style)
-2x Spinners
-1x 2,25 inch trackball and two 24mm buttons
-1x Balltop joystick for arcade classics
-3x leaf switch buttons for arcade classics
-1x Flight stick with dual on-stick buttons
–1-2-3-4 player buttons – US Concave
-controllers for the spinner/trackball/coin door/player button and menu access.
We will be reusing pre-existing hardware too
-iPac for hardware input
-Cabinet, coin door, arcade computer
For this control panel, we will not put the 1-2-3-4 player buttons on the panel but on the front of the machine. Our arcade has an actual coin door with a coin mechanism which is a feature that will remain.
3- Design
To help with the arcade control panel build design, we decided to use graphics software with layers; using an appropriately sized layout taken from Slagcoin and specs sheets. CAD software could also have been useful.
Using graphics software to tweak the layout will have a supplemental advantage in that when we design graphics to put on the same panel – custom control-panel-overlay as seen at GameOnGrafix – we will already have the placement of the buttons for reference…
3.1- Design for the actual cabinet
The first thing for Designing Your Arcade Panel Layout measure the current arcade panel and put it on our layout for reference. We also added a general idea of what the new panel should look like. It was decided to have a rounded front and overshoot the sides of the cabinet. The general shape changed a few times.
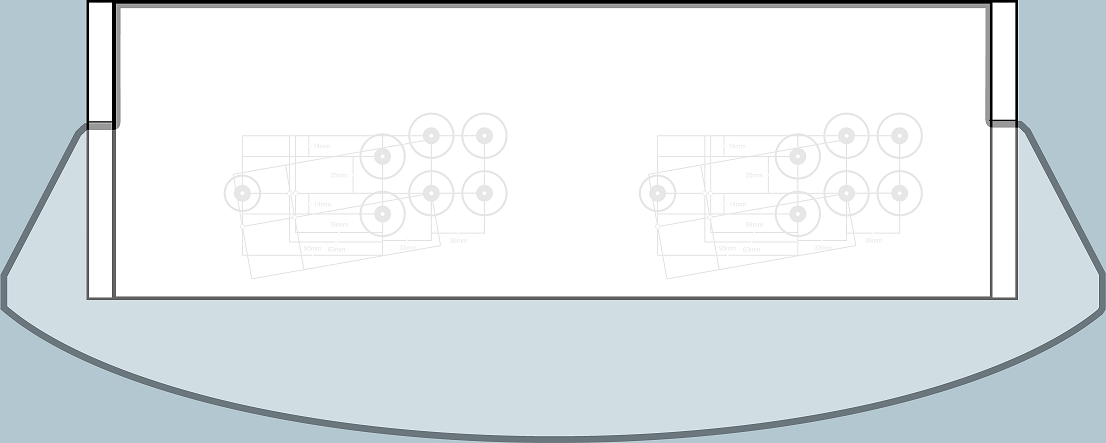
From there, we added the components and moved them around.
3.1.1- Factors to consider in placement
Here are things to keep in mind when placing the components on the panel.
A- Room required to mount the device.
Not everything is visible from the top. Like an iceberg, there is more below than above. For instance, the trackball uses much more room than the actual ball.
B- Hand placement.
While the relation between buttons and their stick has been discussed quite much on Slagcoin, and we used this to base our stick/button setup for a single joystick/button component, we also need to think of the interaction between the various components, and how they will impact each other. Two components cannot be too close as to not be able to be used because of the other components.
C- Gameplay
We need to think of every plausible gaming usage of the various hardware – to place them in such a manner as to keep the player comfortable with any possibilities. For instance, the flight stick may be used standalone, with buttons, or even with a spinner.
D- Dual players
The reason there are two spinners, and two joystick/button sets, is for multiplayer. We didn`t go with a 4-player setup, but we still need to ensure two players can comfortably use all the hardware available to them. Being too close to one another was an issue with the old layout of this cabinet.
E- Arm access to the hardware
Much effort is to be made for anything that is on the back – that is, closer to the monitor than the player. The far-back hardware needs to be accessible and unencumbered, and the player’s arms need to be able to lay comfortably – so the positioning of the hardware in relation to the player and the hardware in-between is a matter of reflection.
F- Hardware/software interface.
While we won’t cover much of the electronics part of making a control panel today, having the electronics to accommodate the hardware is still something to think about ahead of time.
On this control panel we ended up choosing 2x 1-stick-and-6-buttons (10 inputs each when counting up, down, left, right) plus a balltop (4 inputs) and a flight stick (6 inputs including the two buttons) plus 3 leaf switches, trackball and 2 buttons, two spinners. We also opted to place the start buttons (1-2-3-4 player) on the front of the cabinet; partly because we hope to make alternate usage control panels later and want to be able to keep the coin/start functionality – this is also why the coin door/player buttons and such are planned on a separate controller.
This totals 41 normal inputs, 2 mouse buttons, and 4 mouse axes that we will separate on more than a single controller.
We already had an ultimate iPad that will cover most of our needs. Spinners, trackball, and a few buttons will get their own electronics.
3.1.2- Use Cases
Here are the gaming scenarios we explored
A- Two players – joysticks
B- One player using two joysticks
C- Using the ball top joystick with leaf buttons
D- Two players using spinners
E- Using a spinner with the flight stick.
F- Various scenarios of trackball usage.
4- Virtual experimentation
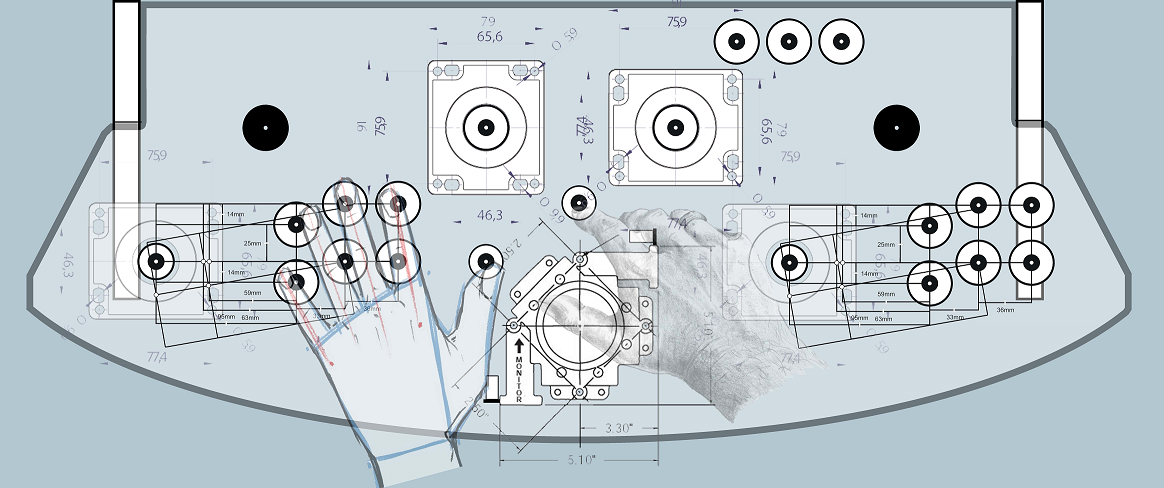
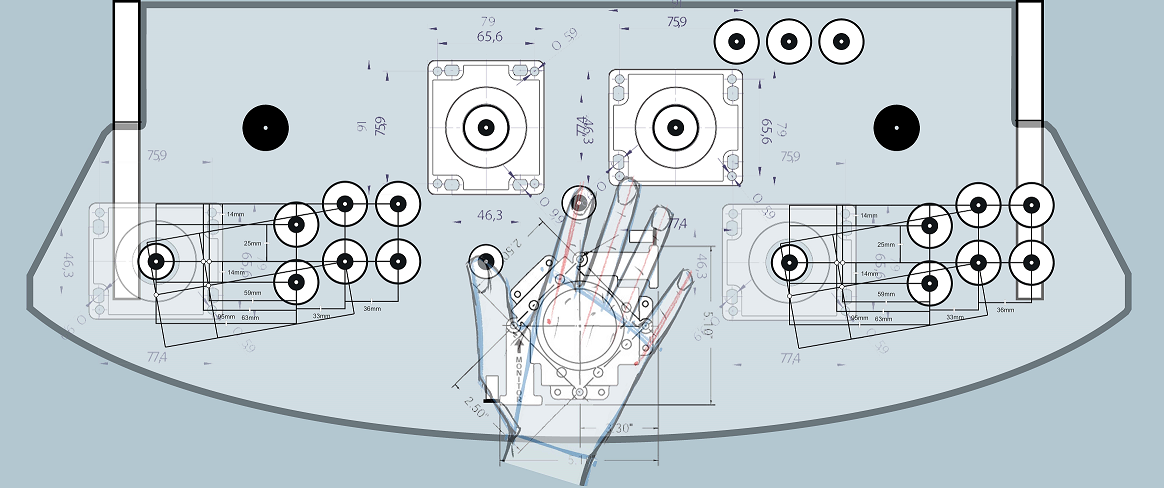
The following are hand placement designs that we made (to scale) to help with the overall layout. Every step created a new positioning iteration to solve issues that were highlighted by how hands and arms would get positioned on the panel and between the components.
4.1- Two Players
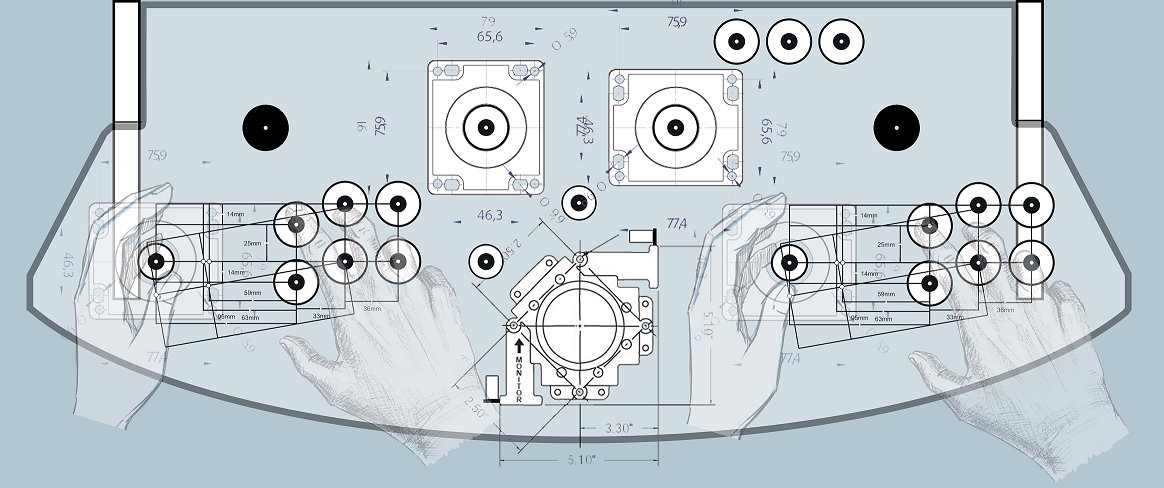
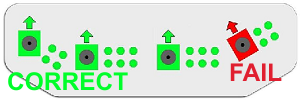
Being that we planned the front of the control panel to be rounded, we originally imagined using this curvature and putting the joystick-button sets at an angle; about 30 degrees to the left or right for players 1 and 2. However, it is documented online that this would mean “up” wouldn’t actually be “up” but somewhat of an angle, which may look OK but is counterintuitive.
This is how they designed the control panel for Q*Bert because they only used diagonals. And it made sense. But for games that use UP, the UP needs to be pointing to the screen…
We opted to put both layouts fully parallel with the screen.
We spaced the players as much apart as possible to keep room for the trackball, which will go in the middle.
4.2- Two Joystick
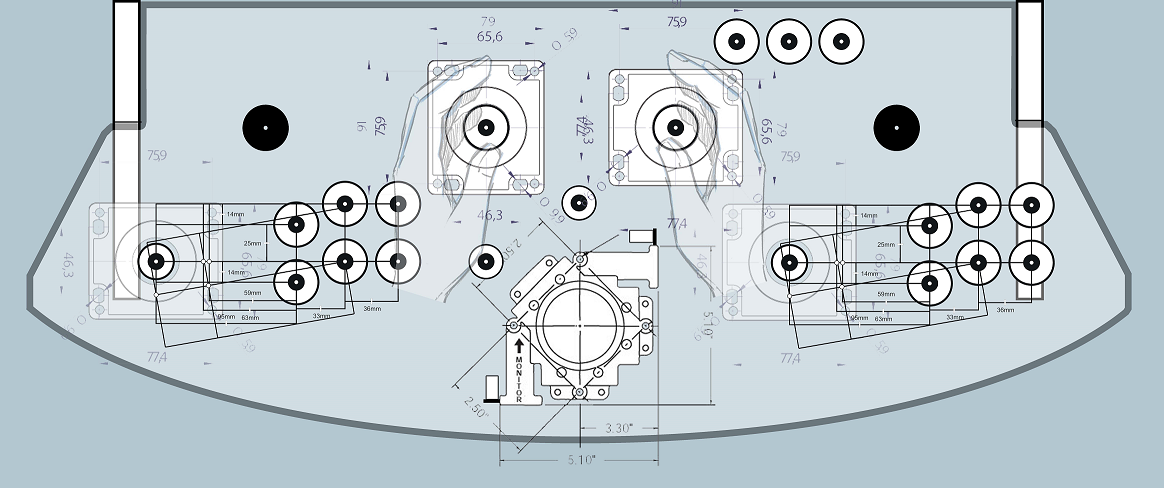
The balltop (left) and flight stick (right) are farther back. this means almost everything else is in front of them.
Something in front of me is actually in the way. We moved them around a few times before finding a combination that leaves room between the front joysticks and the trackball.
4.3- Balltop and buttons
The leaf-switches (top buttons) are meant to be used with the Ball Top (upper left joystick) but we kept them to the right of the joystick – classic games were different from modern 6-button fighting stick games and their buttons were often farther, so this will play well even if the flight stick is between them.
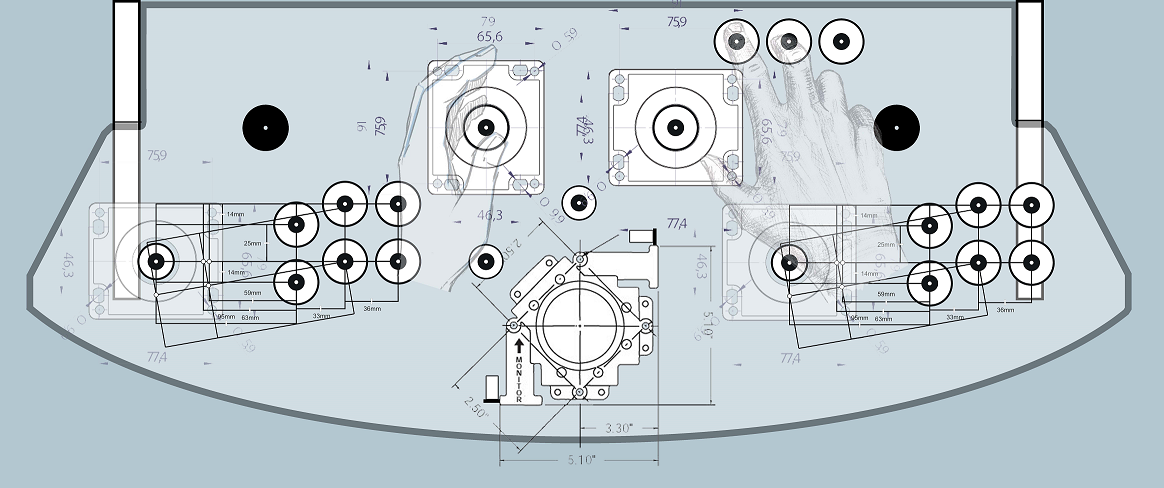
The leaf switches may also be used with the flight stick, or with other joysticks.
4.4- Two player spinners
Pong is very classic. but there are much more joystick games than spinner or paddle ones. For these reasons, the spinners are on the back. But there is enough room around them for hand placement to keep spinner usage comfortable.
We placed them somewhat centered between the arcade walls and the upper joystick, which happens to be also somewhat between the front joystick and their buttons. It seems like the most optimal placement.
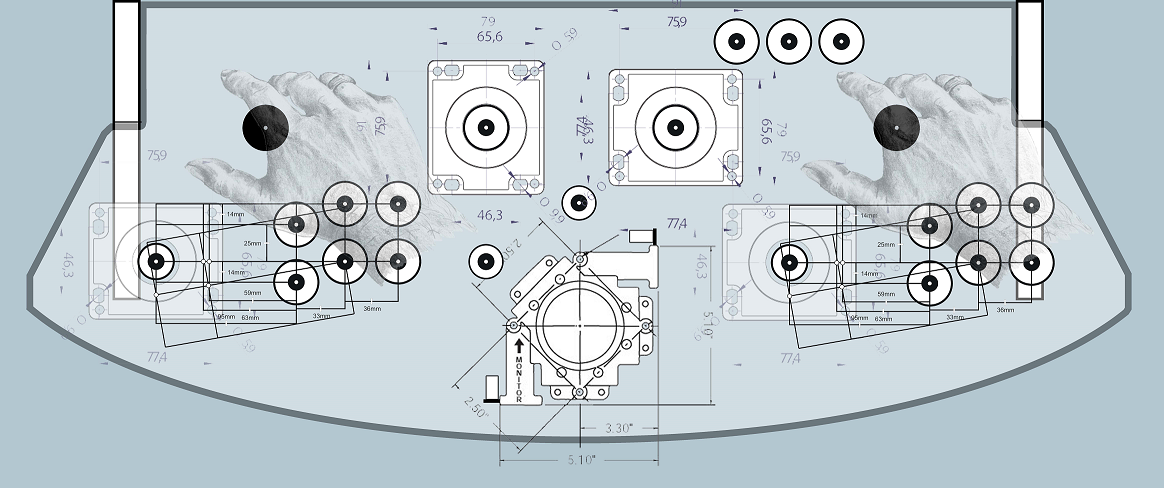
Spinners can also be used with buttons, or with the flight stick.
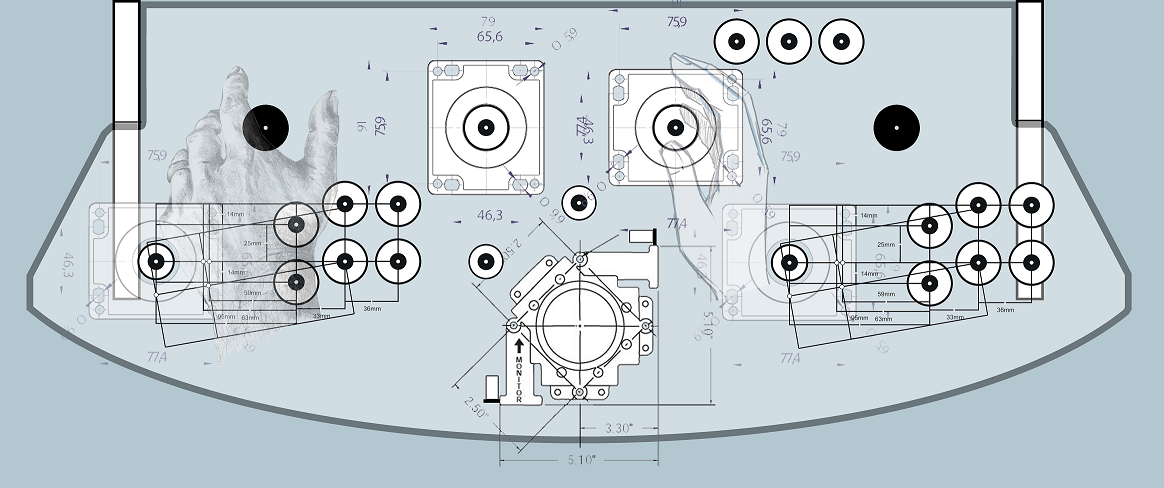
4.5- Spinner/flight stick combo
There are many games that use a joystick, sometimes with triggers, and spinners as well. After moving things around, the setup fits nicely for this feature.
4.6- Trackball
The trackball is a strange beast. Somewhat small from the top, but rather big from the bottom. It also requires room to spin that ball. Lots of room for some games where longer ball rotation is part of the gameplay. The joysticks have all been moved quite a few times before finding a layout that leaves some room all around the ball.
We toyed with the idea of not putting any trackball buttons – there are already a ton of buttons on the panel. Couldn’t we use already existing ones?
But we decided to place the left- and right-click buttons on the mouse. This will be useful for arcade maintenance – essentially using the trackball as an OS mouse.
We also had to choose what types of buttons; full-sized? smaller sized? For some time we thought of something similar to Atari “volcano buttons” but those aren’t as easy to press (more required pressure) and have higher clearance. We opted to put two 24mm Japanese buttons instead. Then we moved them around. A lot. and ended up with having one on the left, one on the top – this seems like it will be most flexible for one- and two-hand operations.
5- Physical experimentation
Once we had the layout almost finalized, we printed the design to figure out further how it would feel – full-size print (on multiple sheets of paper) and used the realized paper sketch to help imagine how the button placement will feel with the hands and arms moving around. This helped finalize the tweakings.
Here is one of the many prints that were made duging the design process
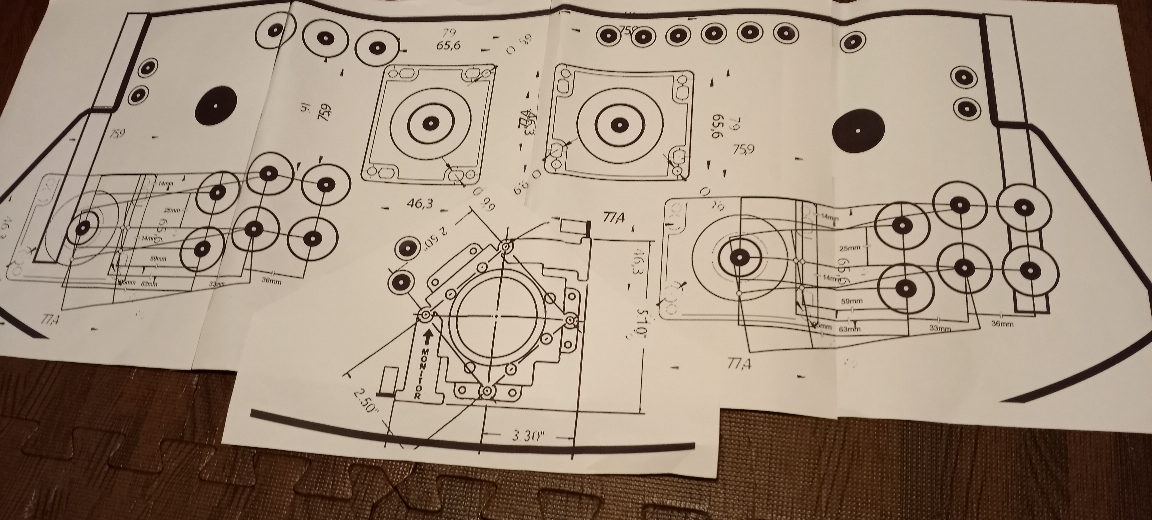
On this layout were possible button placements that changed since – we have decided to put the leaf switch to the right instead of the left; not as close to the ball top, but on the correct side.
Conclusion For Designing Your Arcade Panel Layout
This concludes the tough process of going through a control panel design.
= Fun story, hardware construction had already begun by the time we finalized the trackball button placement… at some point, one just has to decide what to do, and just do it. There are no right or wrong designs, but many, many options…
Soon we will talk about construction, as well as graphics design.
Build an arcade control panel for your computer or console (were all geeks)
Build an arcade control panel for your computer or console (reposted on GameOnGrafix)
Slagcoin button layout (Slagcoin)
